Every time I go over to Mark's shop, I learn a little more, and this past month is no exception. I'd honestly say that this motor is a great thing to learn on, since it's simple, yet maintains principles that are continued with contemporary engines. I'm going to break it up, just like the motor parts, to try and keep records, and help explain what we're doing...
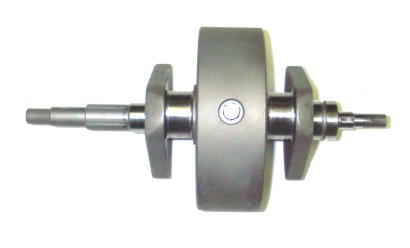
Bottom end: Being a unit twin, the cases house the transmission, the clutch and a bijillion other little things, but most importantly, it houses the crank, which looks like this:
Top end: I have to say that whenever you pull out a big acetylene torch to super-heat metal, it's nerve wracking. Here's the top end:

I polished the crap out of this, and it looked awesome, then we hit it with the torch to get the old valve guides out and got carbon all over it, so I've got to polish it again. Derp. The new guides went in pretty easily, but after lots of measuring, they need to be honed to 0.313 (7.95mm) for the new valves, which requires a new specialty reamer. We tested the springs, and they're all in good shape, so that's at least something I don't have to buy. So far, we're talking $175 to recondition and rebuild it. Ugh.
Pistons/Cylinder: My first thought was to take my cylinder, get new pistons at +0.40 over and bore it out. That would have cost $500. Shit. Now, my pistons are in great shape. They're Hepolite +0.20, and I have brand new rings for them.

Instead... I bought a used cylinder for $90 that I can bore out to +0.20 and not feel bad about. Genius. I can use my good race-quality pistons and rings, and get rid of a cylinder that already had a chip in the bottom. All I have to do is clean it up and repaint it with engine enamel and it's as good as new. (It's currently sitting in customs from Canada, because they might think it's a bomb.)
No comments:
Post a Comment